Intune bulk assignments
To roll out assignments in bulk, you need the Rollout Assistant module. This is a premium module of Intune Assistant. It helps administrator to roll out configurations in a controlled way. In this documentation you will find all the information you need to know about how to enroll assignments in bulk into Intune.
Requirements
To use this feature you have to purchase a license per tenant. More information about licencing check the please contact us. When missing the correct license you will see a page with the following error:
Your tenant needs the correct before you can use this feature.
Permissions
Making assignments needs extra permissions above the READ permissions find READ permissions here.
- DeviceManagementApps.ReadWrite.All -> Read and Write Microsoft Intune apps
- DeviceManagementConfiguration.ReadWrite.All -> Read and Write Microsoft Intune Device Configuration and Policies
Roll out Intune Assignments in bulk
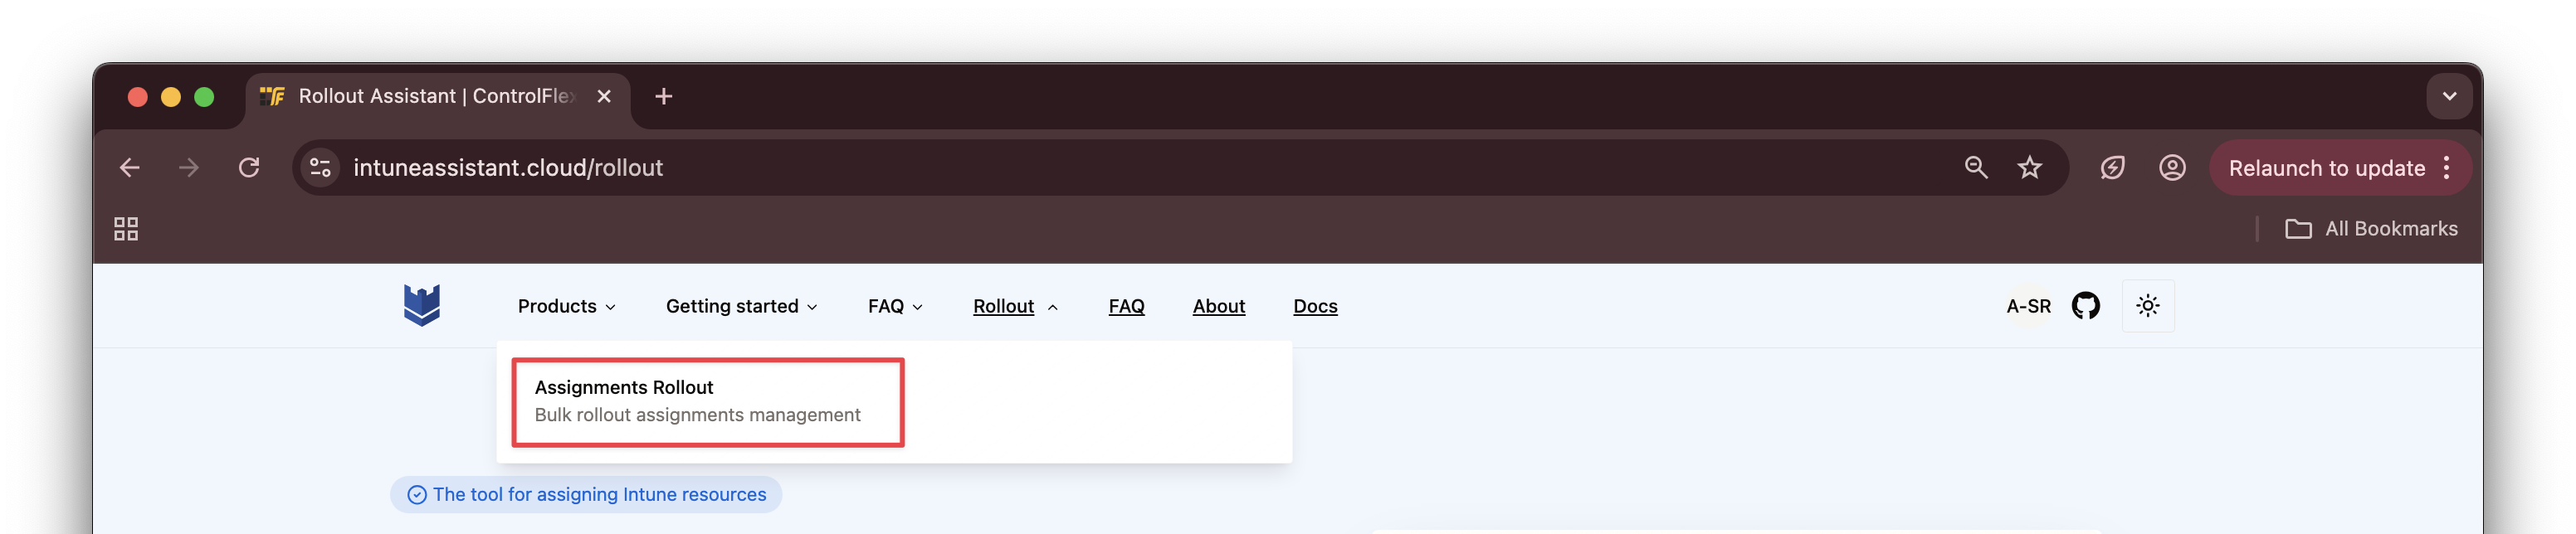
When using the Rollout Assistant you need to set the right context. That means you have to select the correct module. (See select module for more information about the context).
When the context is set to Rollout Assistant, you will see the Rollout menu. Then go to Assignments Rollout.
When you click on the Assignments Rollout menu, you will be redirected to the Assignments page. This is the page where you can upload your CSV file with assignments.
Upload CSV
When having the correct license, you get access to the assignments page. The page has looks like the screenshot below.
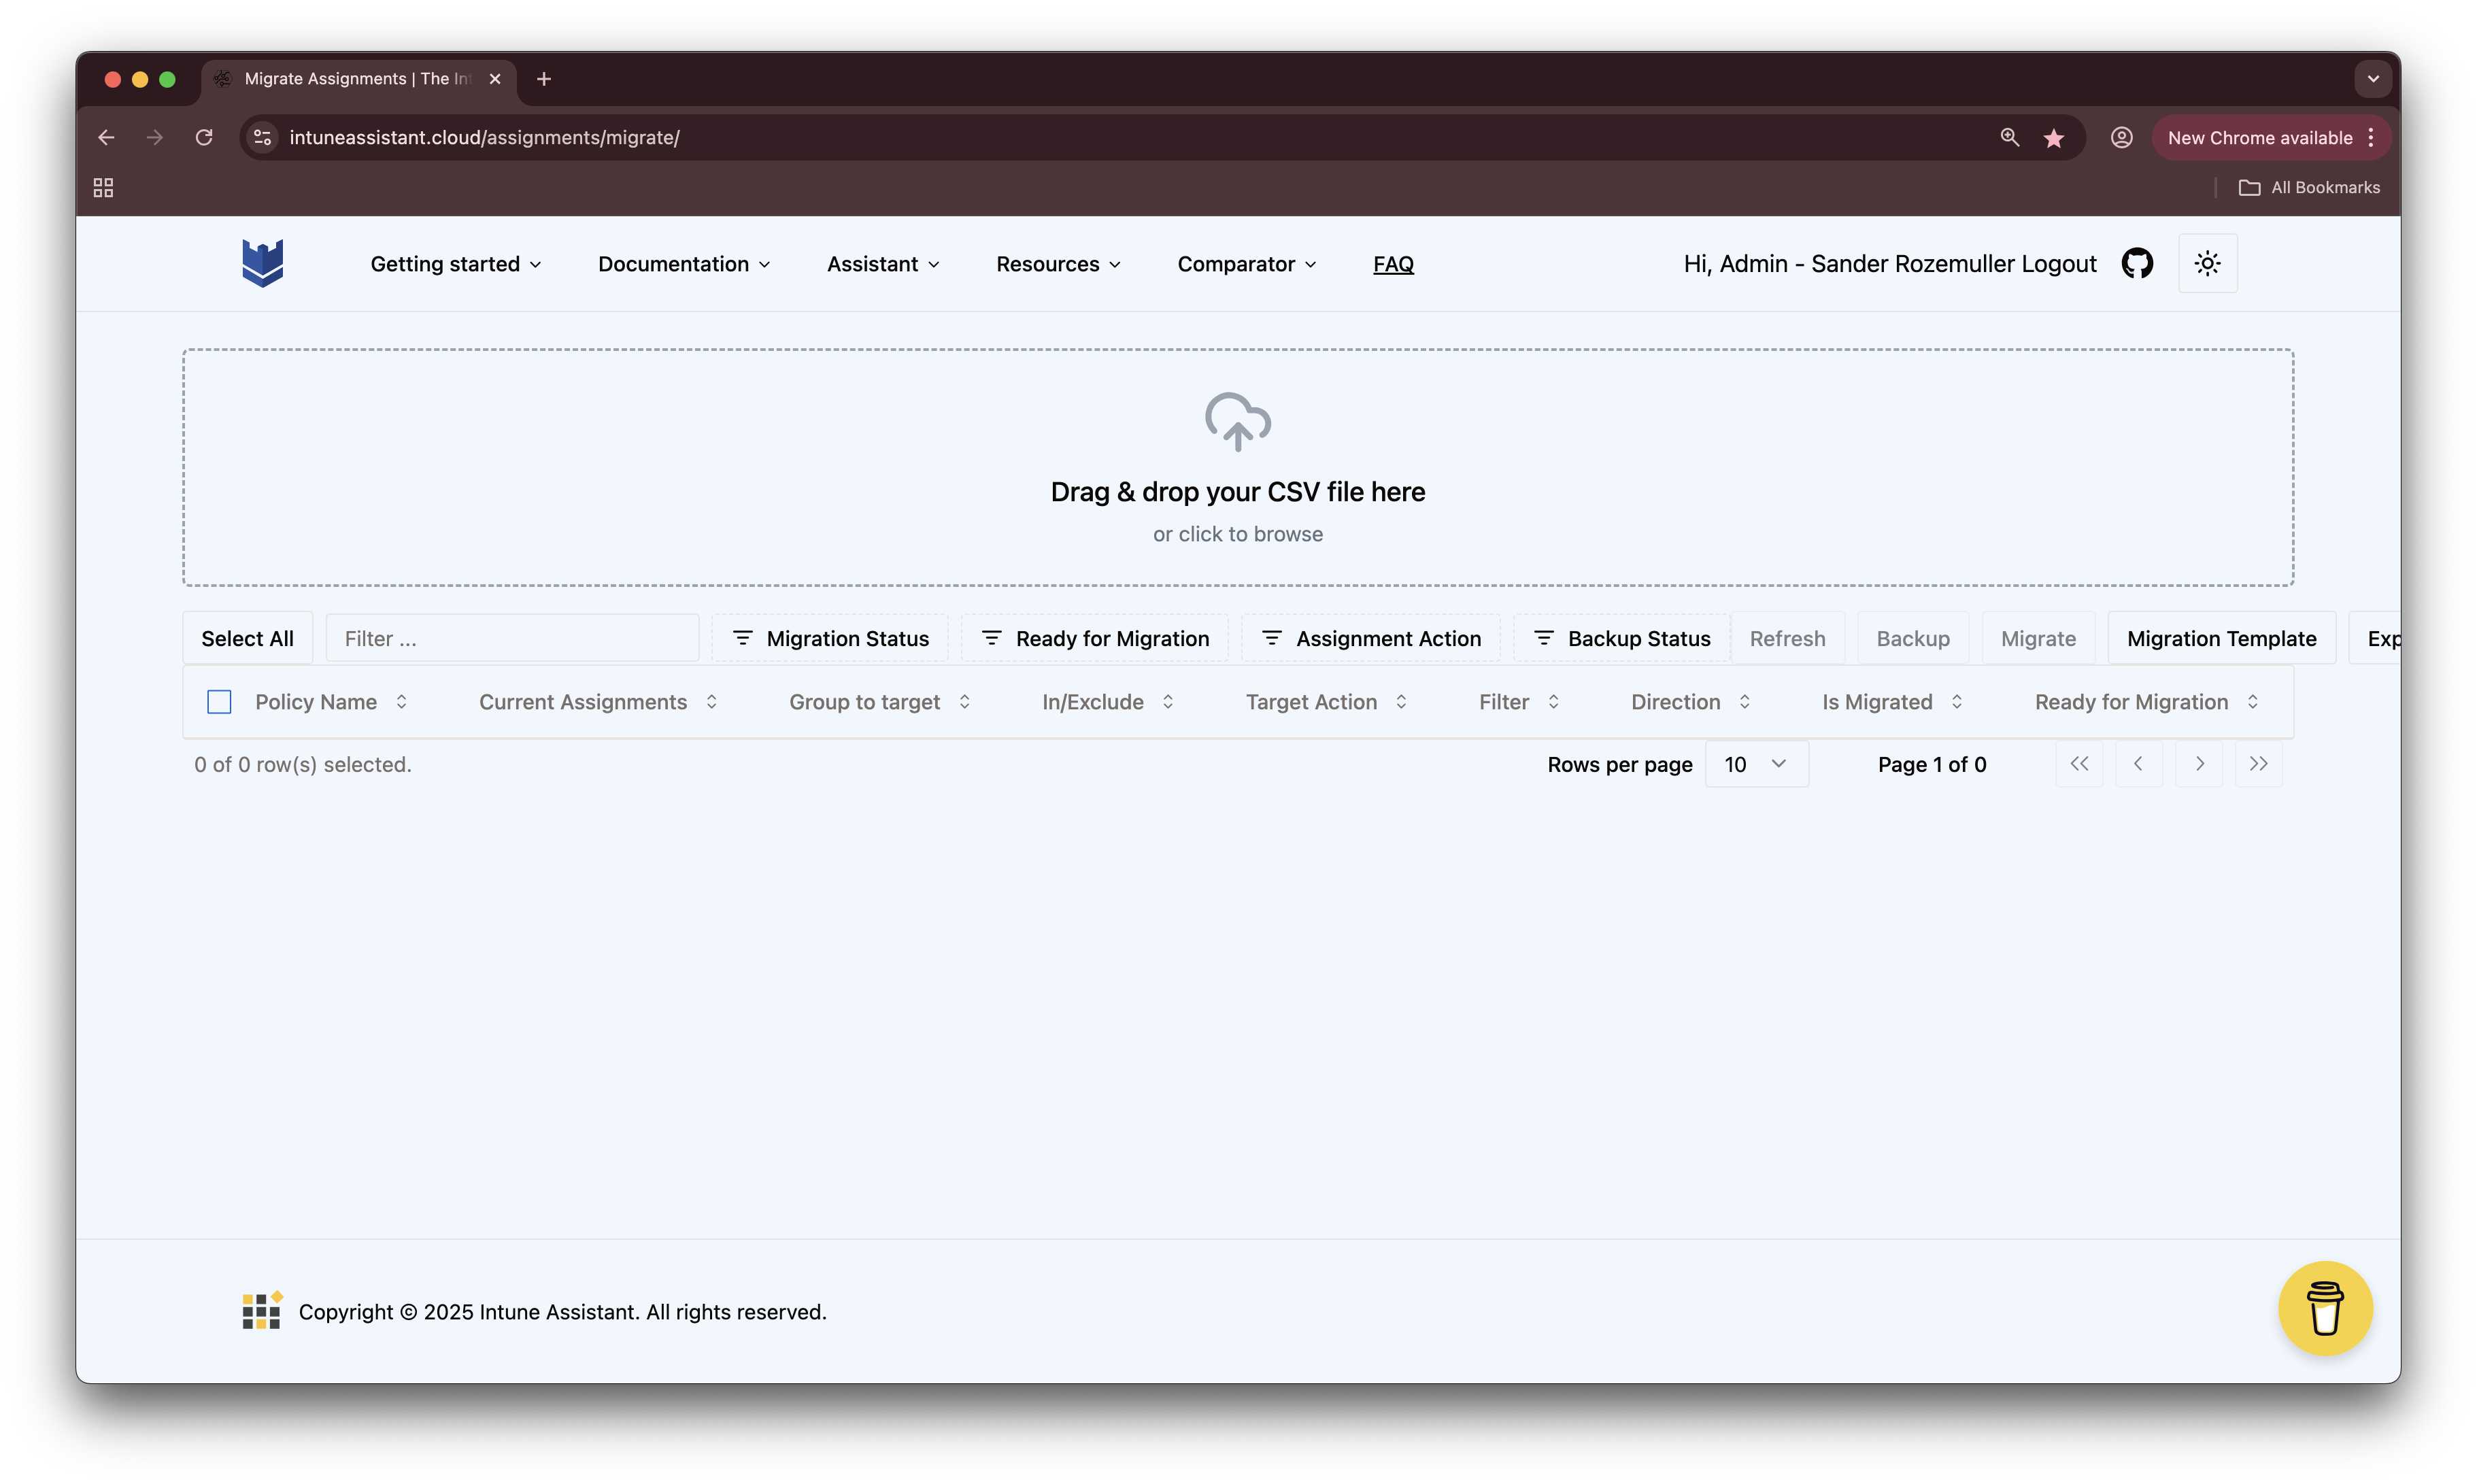
Currently only configuration and compliance policy assignments are supported.
To add Intune assignments in bulk you need to provide CSV file. The CSV file contains several columns that makes the rollout possible. You can download the CSV file template here. Use the Migration Template button.
CSV file explained
The CSV file has several columns.
- PolicyName -> It is the name of the policy
- GroupName -> This is the Entra ID group name. All Users and All Devices are also supported, keep in mind these are the Intune objects.
- AssignmentDirection -> This is the assignment direction include or exclude the assignment (Values: include, exclude)
- AssignmentAction -> This is the action to add, remove or replace the assignment (Values: add, remove, replace)
- FilterName -> This is the filter name
- FilterType -> This tells if you want to include or exclude the filter (Values: include, exclude)
Example
An example of the CSV file is shown below:
PolicyName;GroupName;AssignmentDirection;AssignmentAction;FilterName;FilterType
AE - Compliance Policy - Corporate owned dedicated device - v1.0;AAD_UA_Update-Ring-01;Include;Add;MacBook;include
macOS - CP - Delay Major Software Updates - v1.0;All Users;Include;Add;;
W11 - CP - Remove Chat Icon - v1.1;AAD_DA_AutoPilot-Devices-Shared;Exclude;Add;Windows 11;include
W1x - CP - Block access to public Microsoft Store - v1.0;All Devices;Include;Add;;
Scenario's
-
I want to add an assignment that includes All Users (Intune) without a filter.
W1x - CP - Block access to public Microsoft Store - v1.0;All Users;Include;Add;; -
I want to add an assignment that included All Devices (Intune)
W1x - CP - Block access to public Microsoft Store - v1.0;All Devices;Include;Add;; -
I want to add an assignment that included an Entra ID group with a filter.
-
I want to add an assignment that excludes an Entra ID group without a filter.
-
I want to remove an included assignment
-
I want to replace all current assignments with a new assignment
Intune bulk assignments
When your CSV is ready, you can drop the CSV on the page or use the upload button to select the file from you system. After that, the upload process will check if you CSV has valid rows. Checks included for example are valid value and duplicate rows.
When uploaded successfully, you will see the CSV rows in the table below.
Indicators
You see a few indicators in the table. These indicators are used to show the status of the row. The indicators are on different columns that help you to understand the status of the row and if migration is possible.
Is migrated column
- Is Migrated: This column tells you if the current row is migrated or not.
- Green Check: The row is migrated.
- Red Cross: The row is not migrated.
Example:
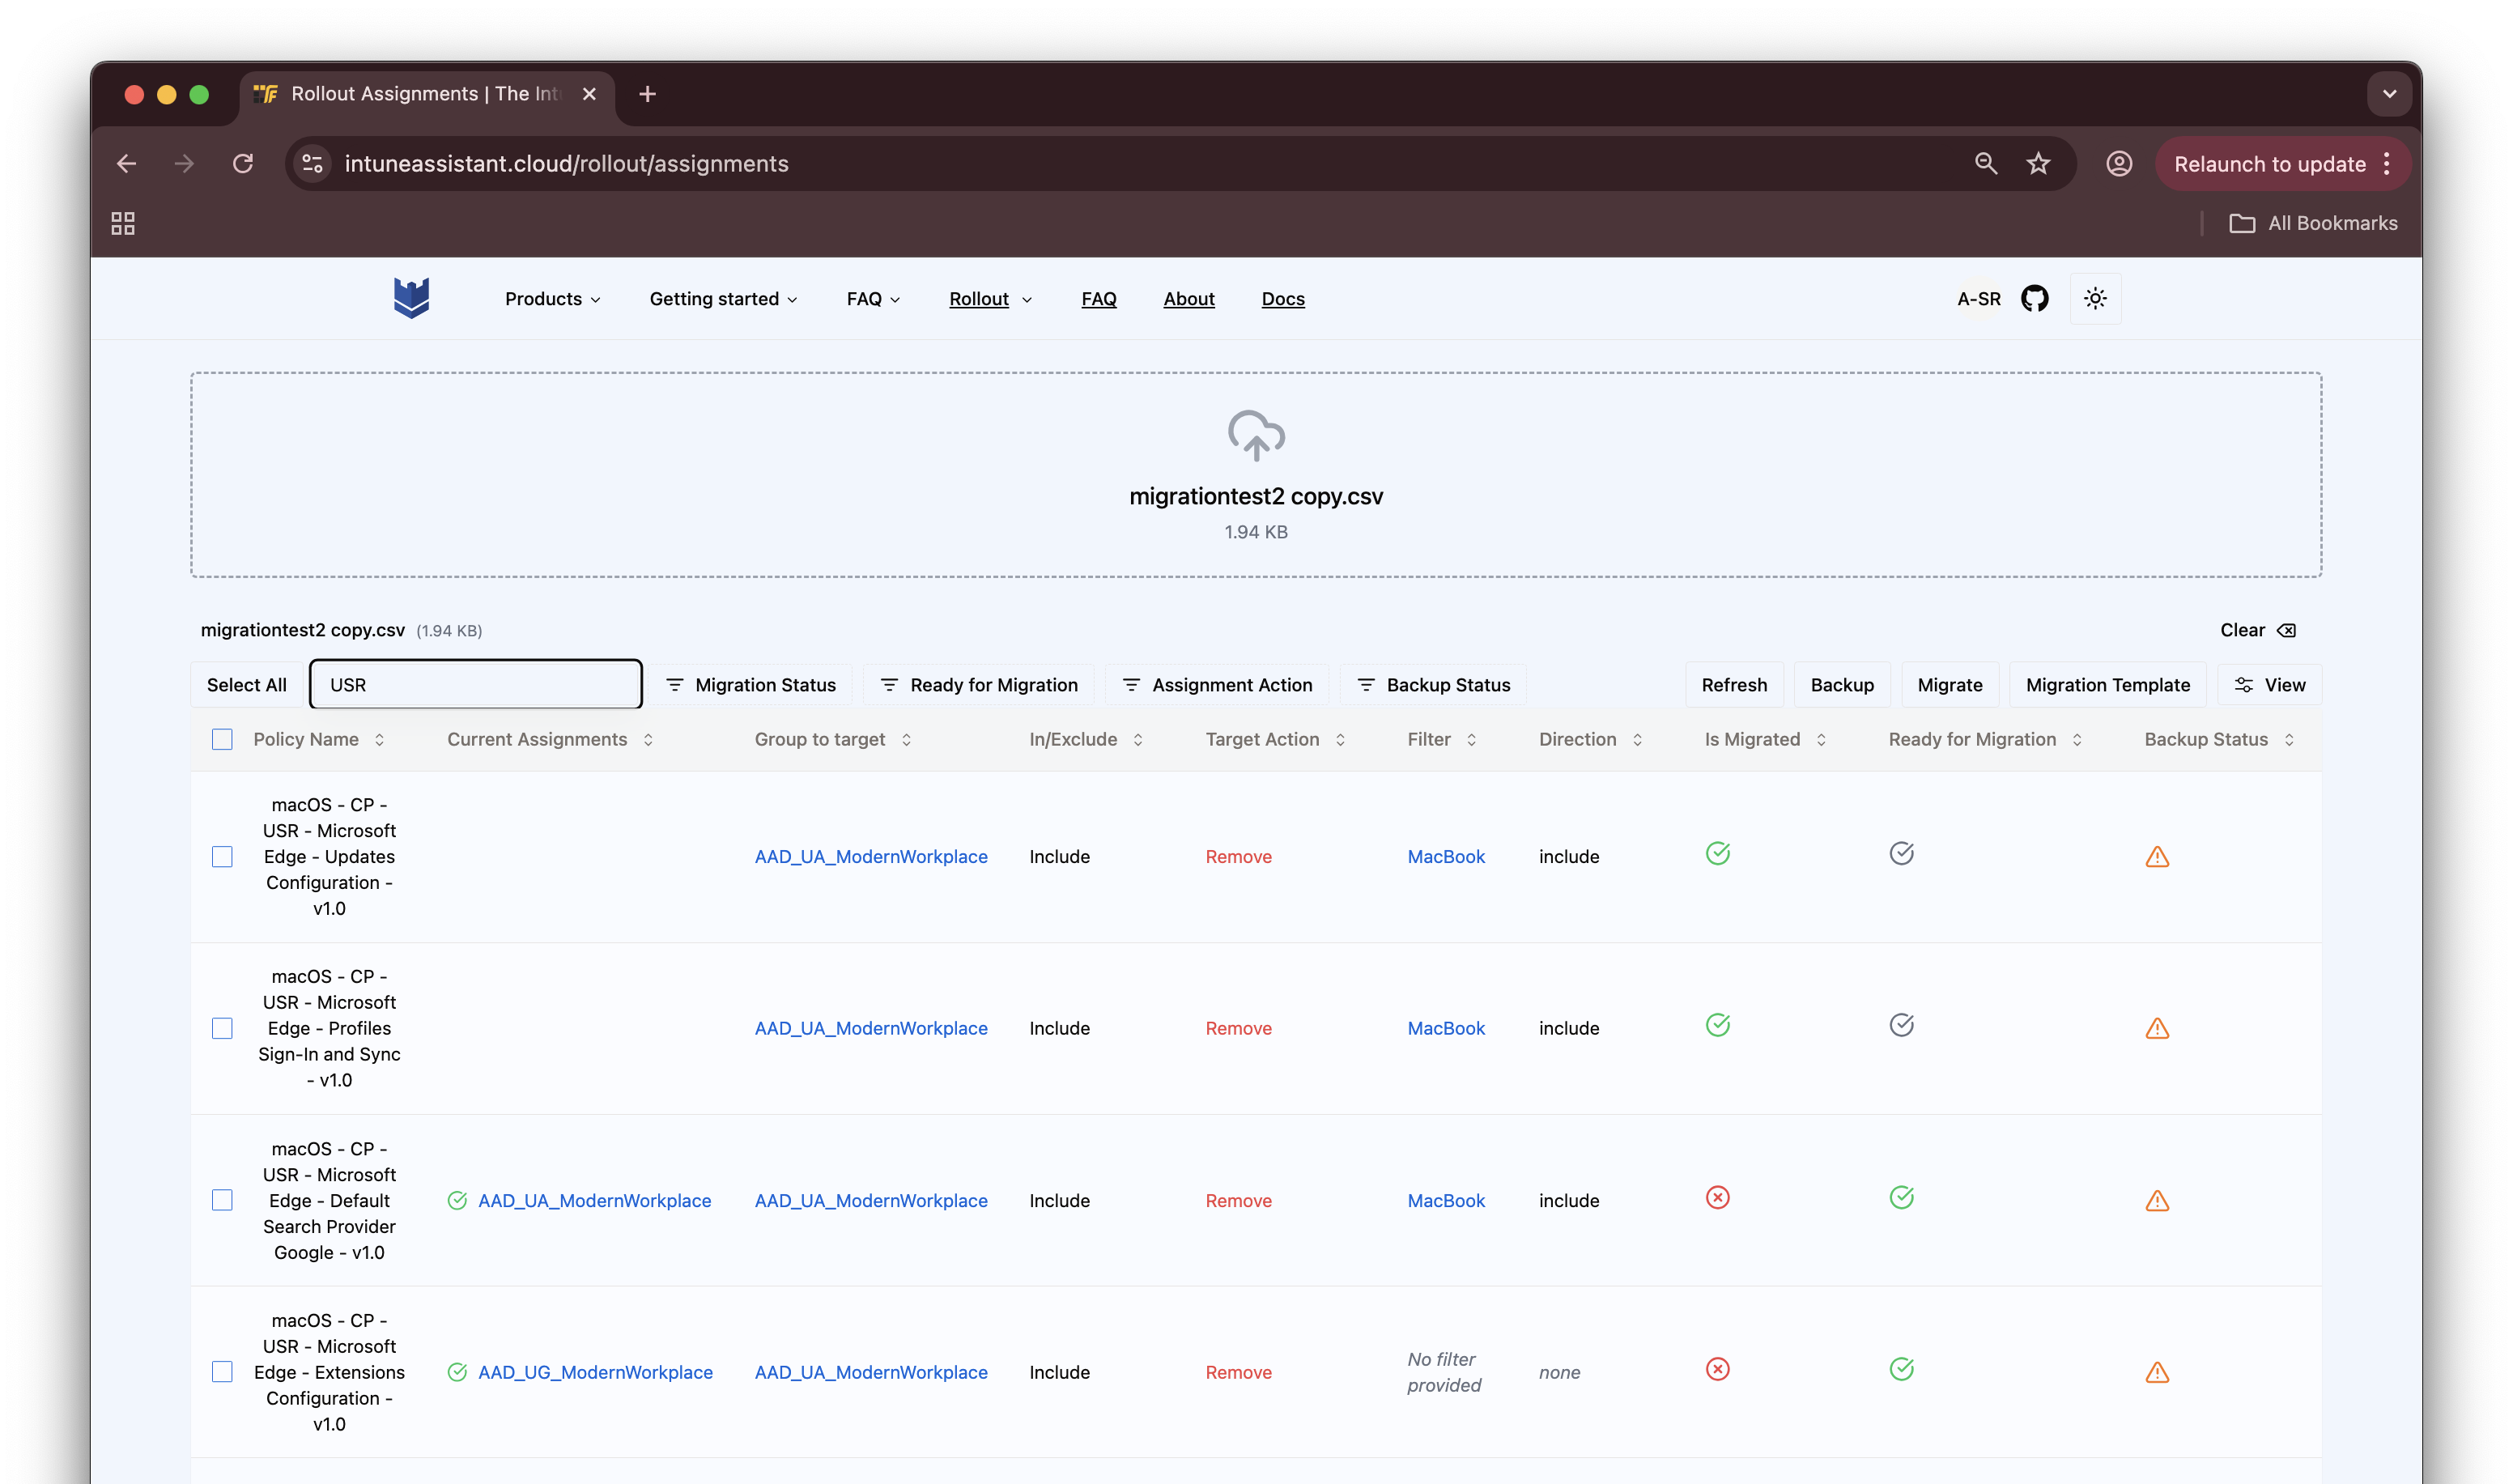 In the screenshot you see a few rows. Some rows are not migrated and some are.
In the specific case in the screenshot I remove the group AAD_UA_ModernWorkplace from a policy.
In the screenshot you see a few rows. Some rows are not migrated and some are.
In the specific case in the screenshot I remove the group AAD_UA_ModernWorkplace from a policy.
The first two rows are migrated because that group is not targeted anymore on that policy.
The last two rows still have that assignment.
The is migrated check, check if the whole assignment is there. So including the filter.
Is ready for migration
- Ready for migration: This column tells you if the current row is able to migrate.
- Green Check: The row is able.
- Orange Warning sign: The row is not able.
Example:
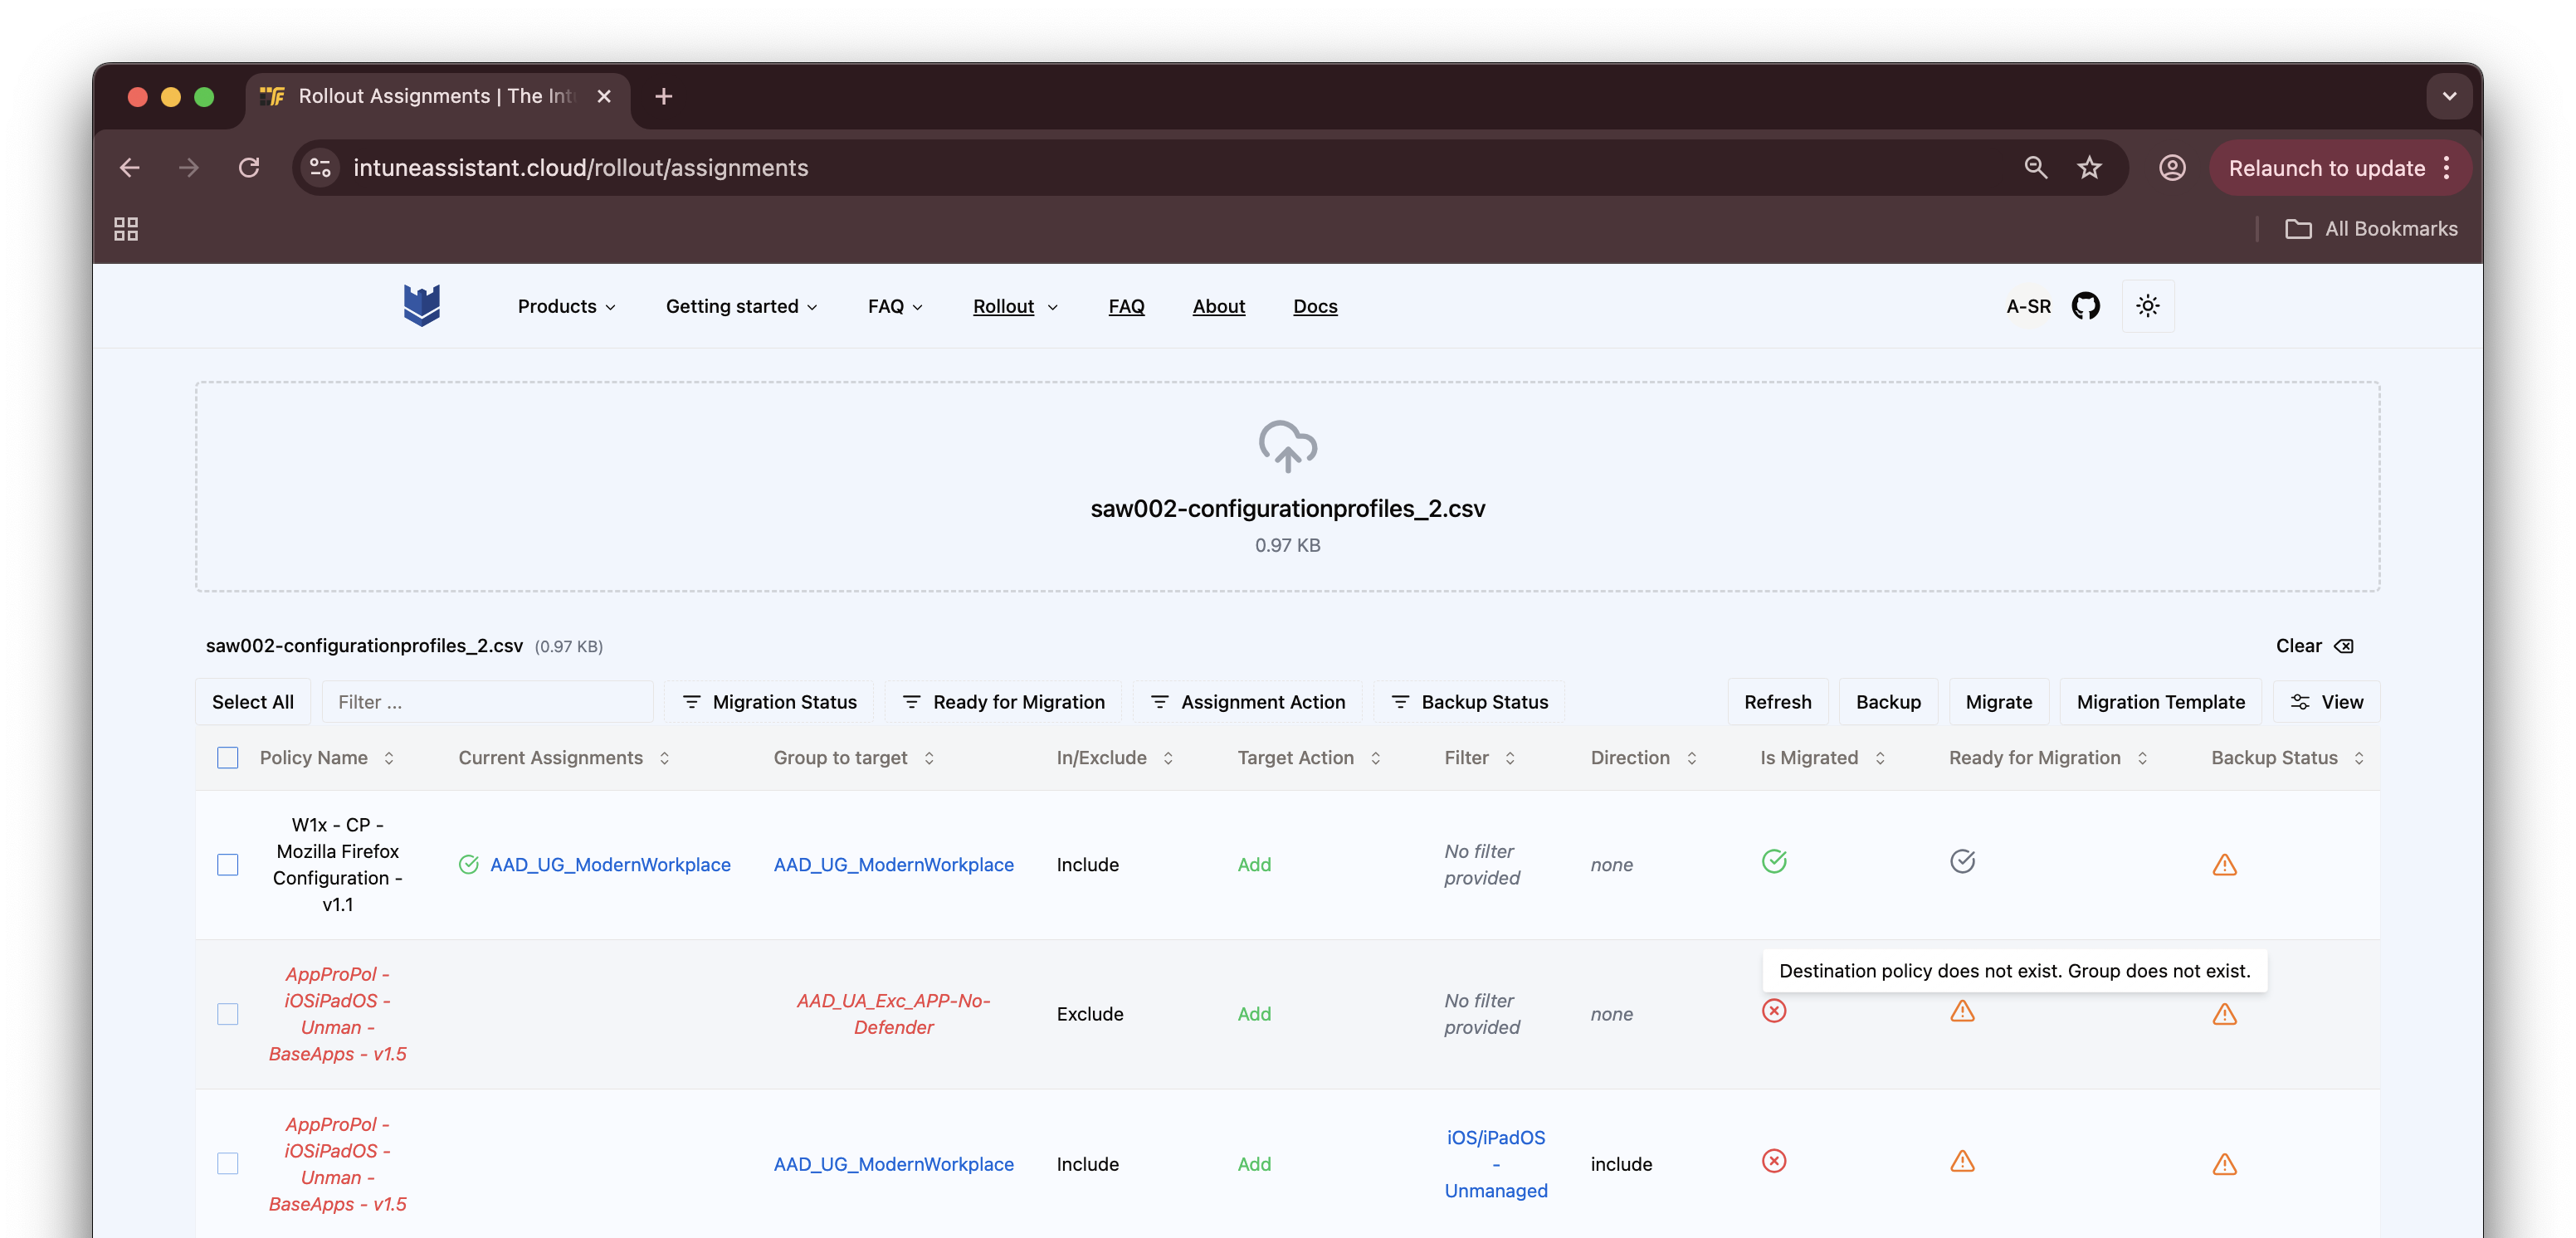 In the screenshot you see a few rows that are not ready for migration.
When hovering over the orange warning sign, you will see a tooltip with the reason why it is not ready for migration.
In this case the reason is that the group is not found in the tenant as also the policy does not exist.
A lot of checks are done before the migration is possible. Think about the following checks:
- The group exists in the tenant
- The policy exists in the tenant
- The policy is not assigned to the group already
- The policy name is unique in your tenant
- (if provided) The filter platform is correct regarding the policy platform
- (if provided) The filter exists and is unique
You can only migrate rows that are ready for migration. If a row is not ready for migration, you can not migrate it.
That means that in the row menu the migrate button is disable. When selecting all the rows, it only selects the rows that are ready for migration.
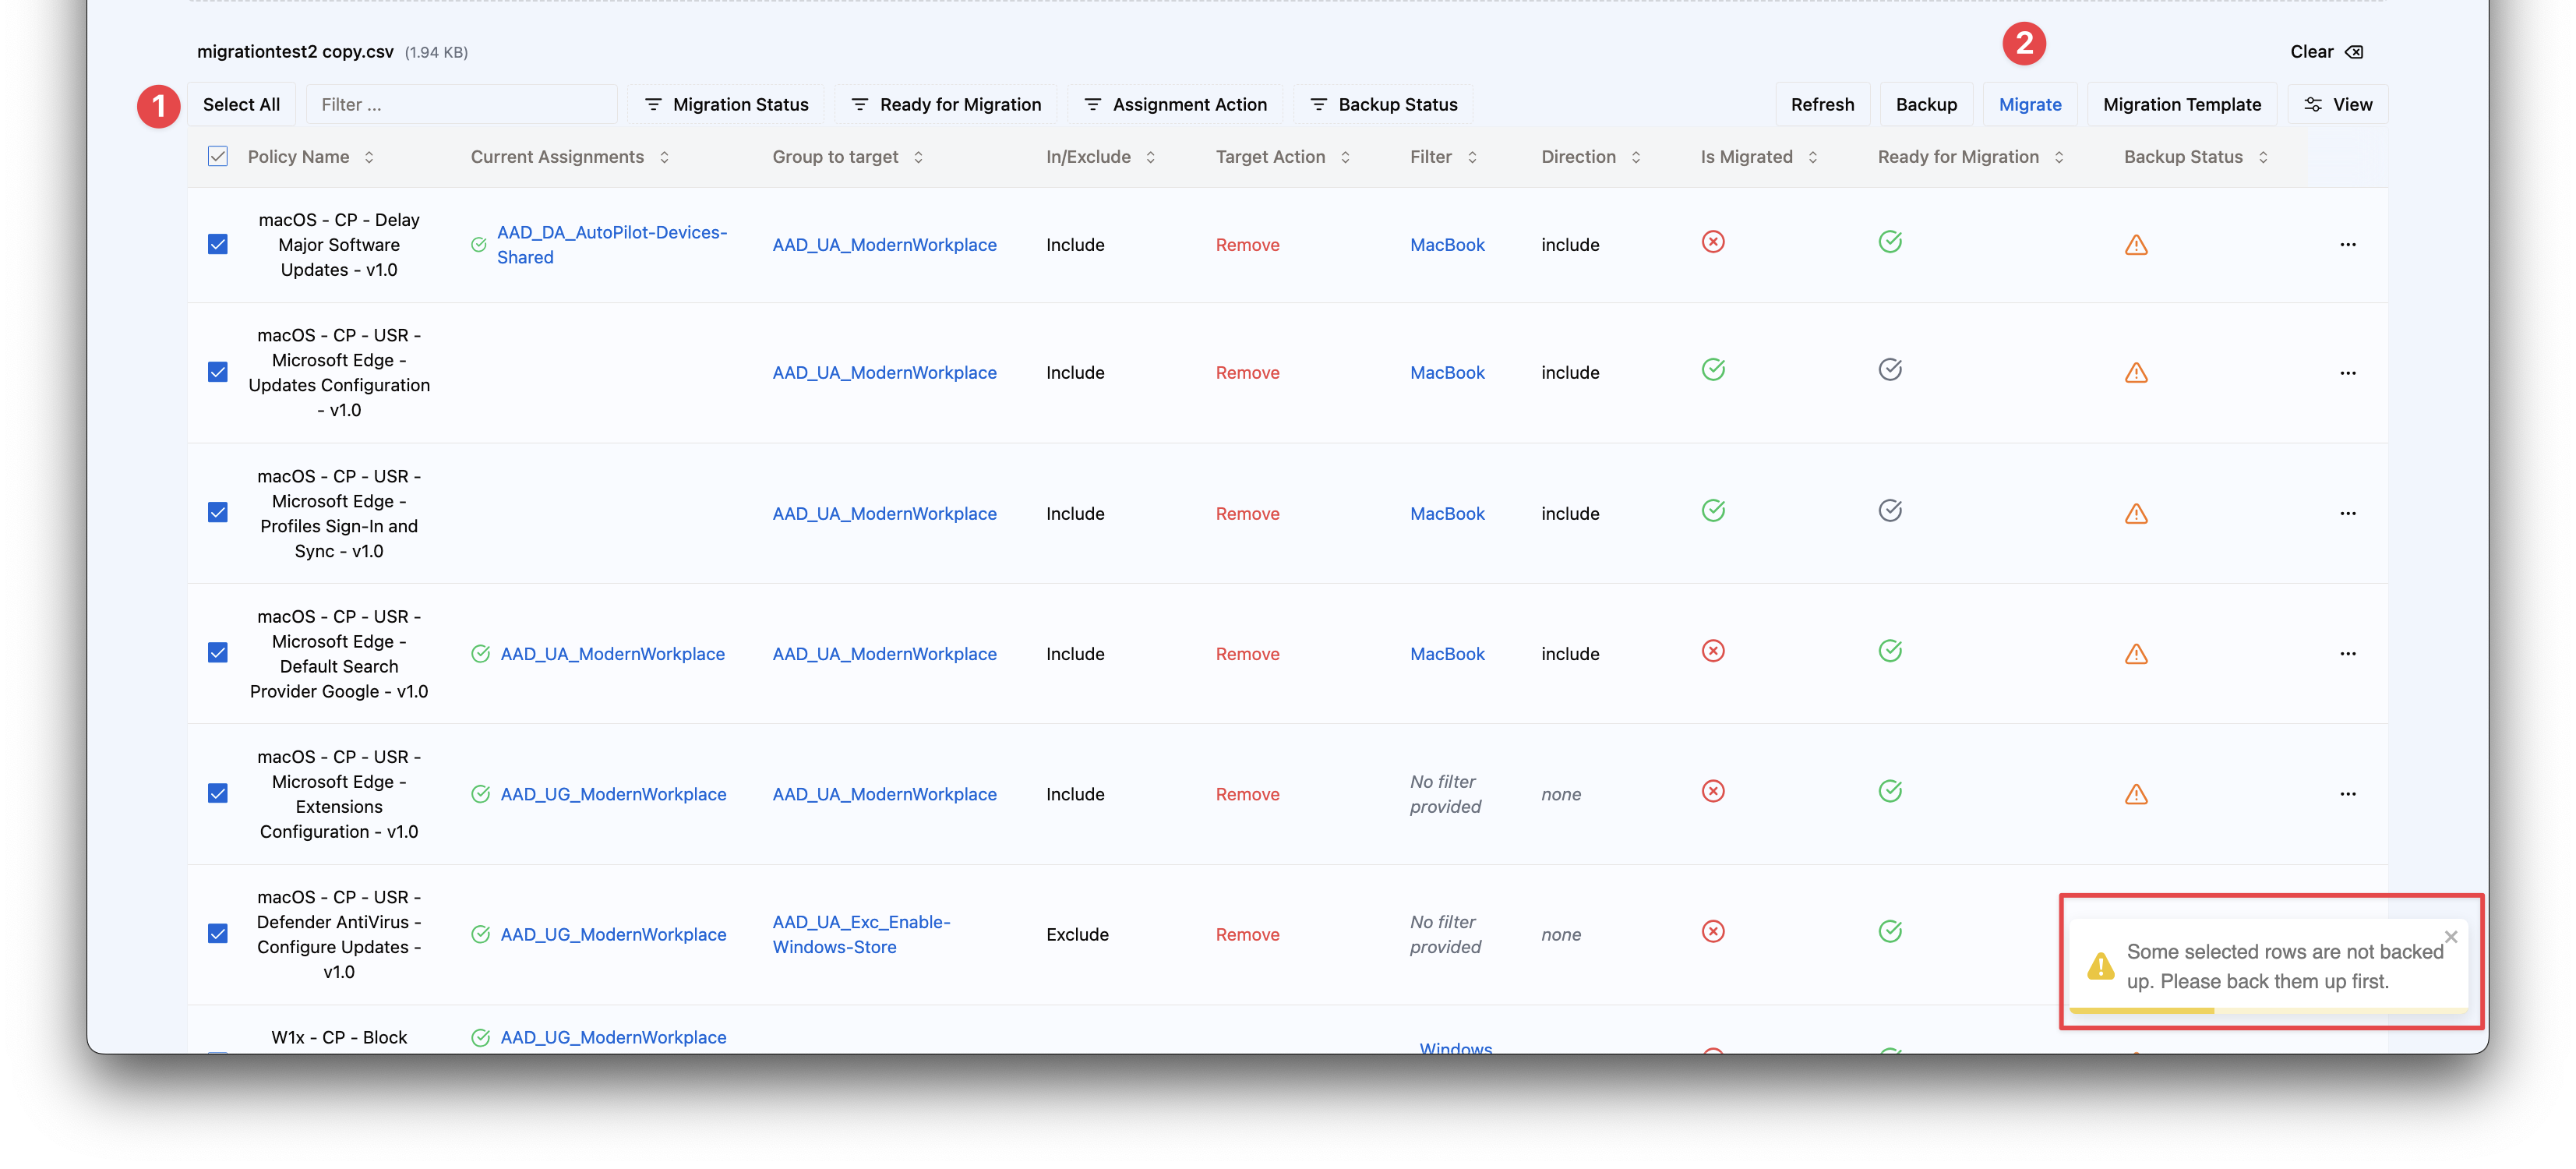
Backup status
- Backup status: This column tells you if the current row is backupped or not.
- Green Check: The row is backupped.
- Orange Warning sign: The row is not backupped.
Example:
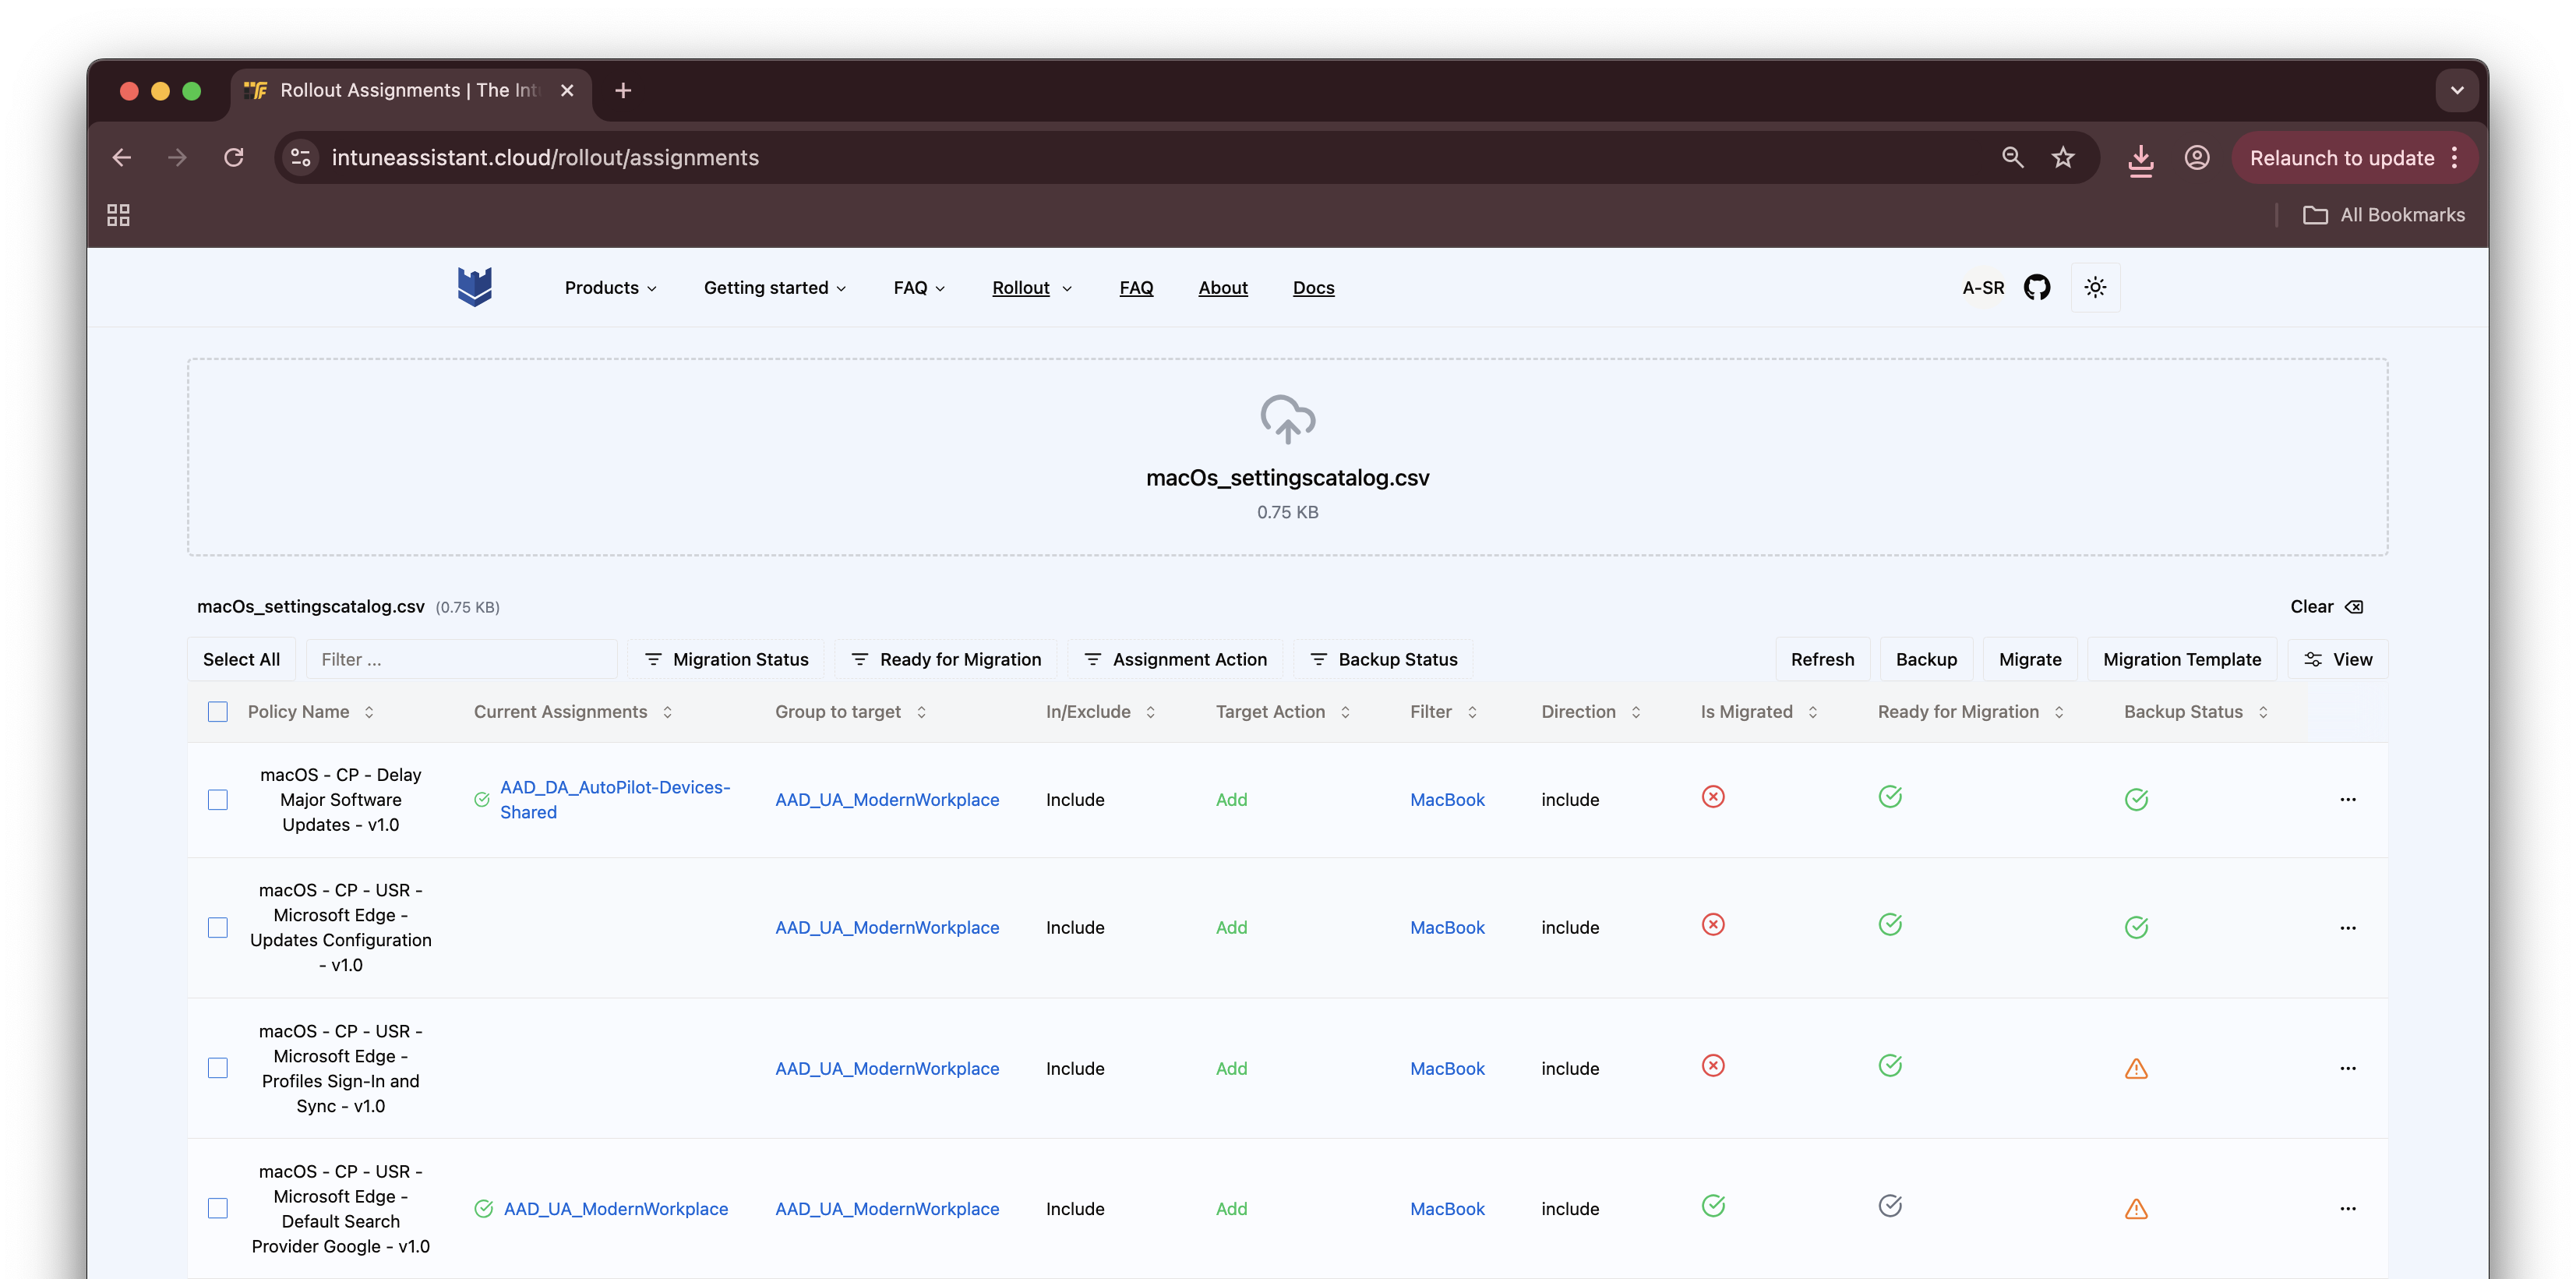 In the screenshot you see a few rows that are not backupped.
- To backup a row, use the three dots at the end of the row and select backup.
It is also possible to backup all rows at once by selecting the using the Select All button and hit the backup button at the top of the table. The indicator will change to a green check when the backup is done.
It is important to backup the rows before migrating them.
When using bulk migration, (selecting all rows and hit the migrate button). You MUST backup the rows.
When migrate just one row, you can skip the backup but you will get a warning.
Below, you see a backup warning. You selected all rows, and hit the migrate button. You will get a warning that you need to backup the rows before migrating them.