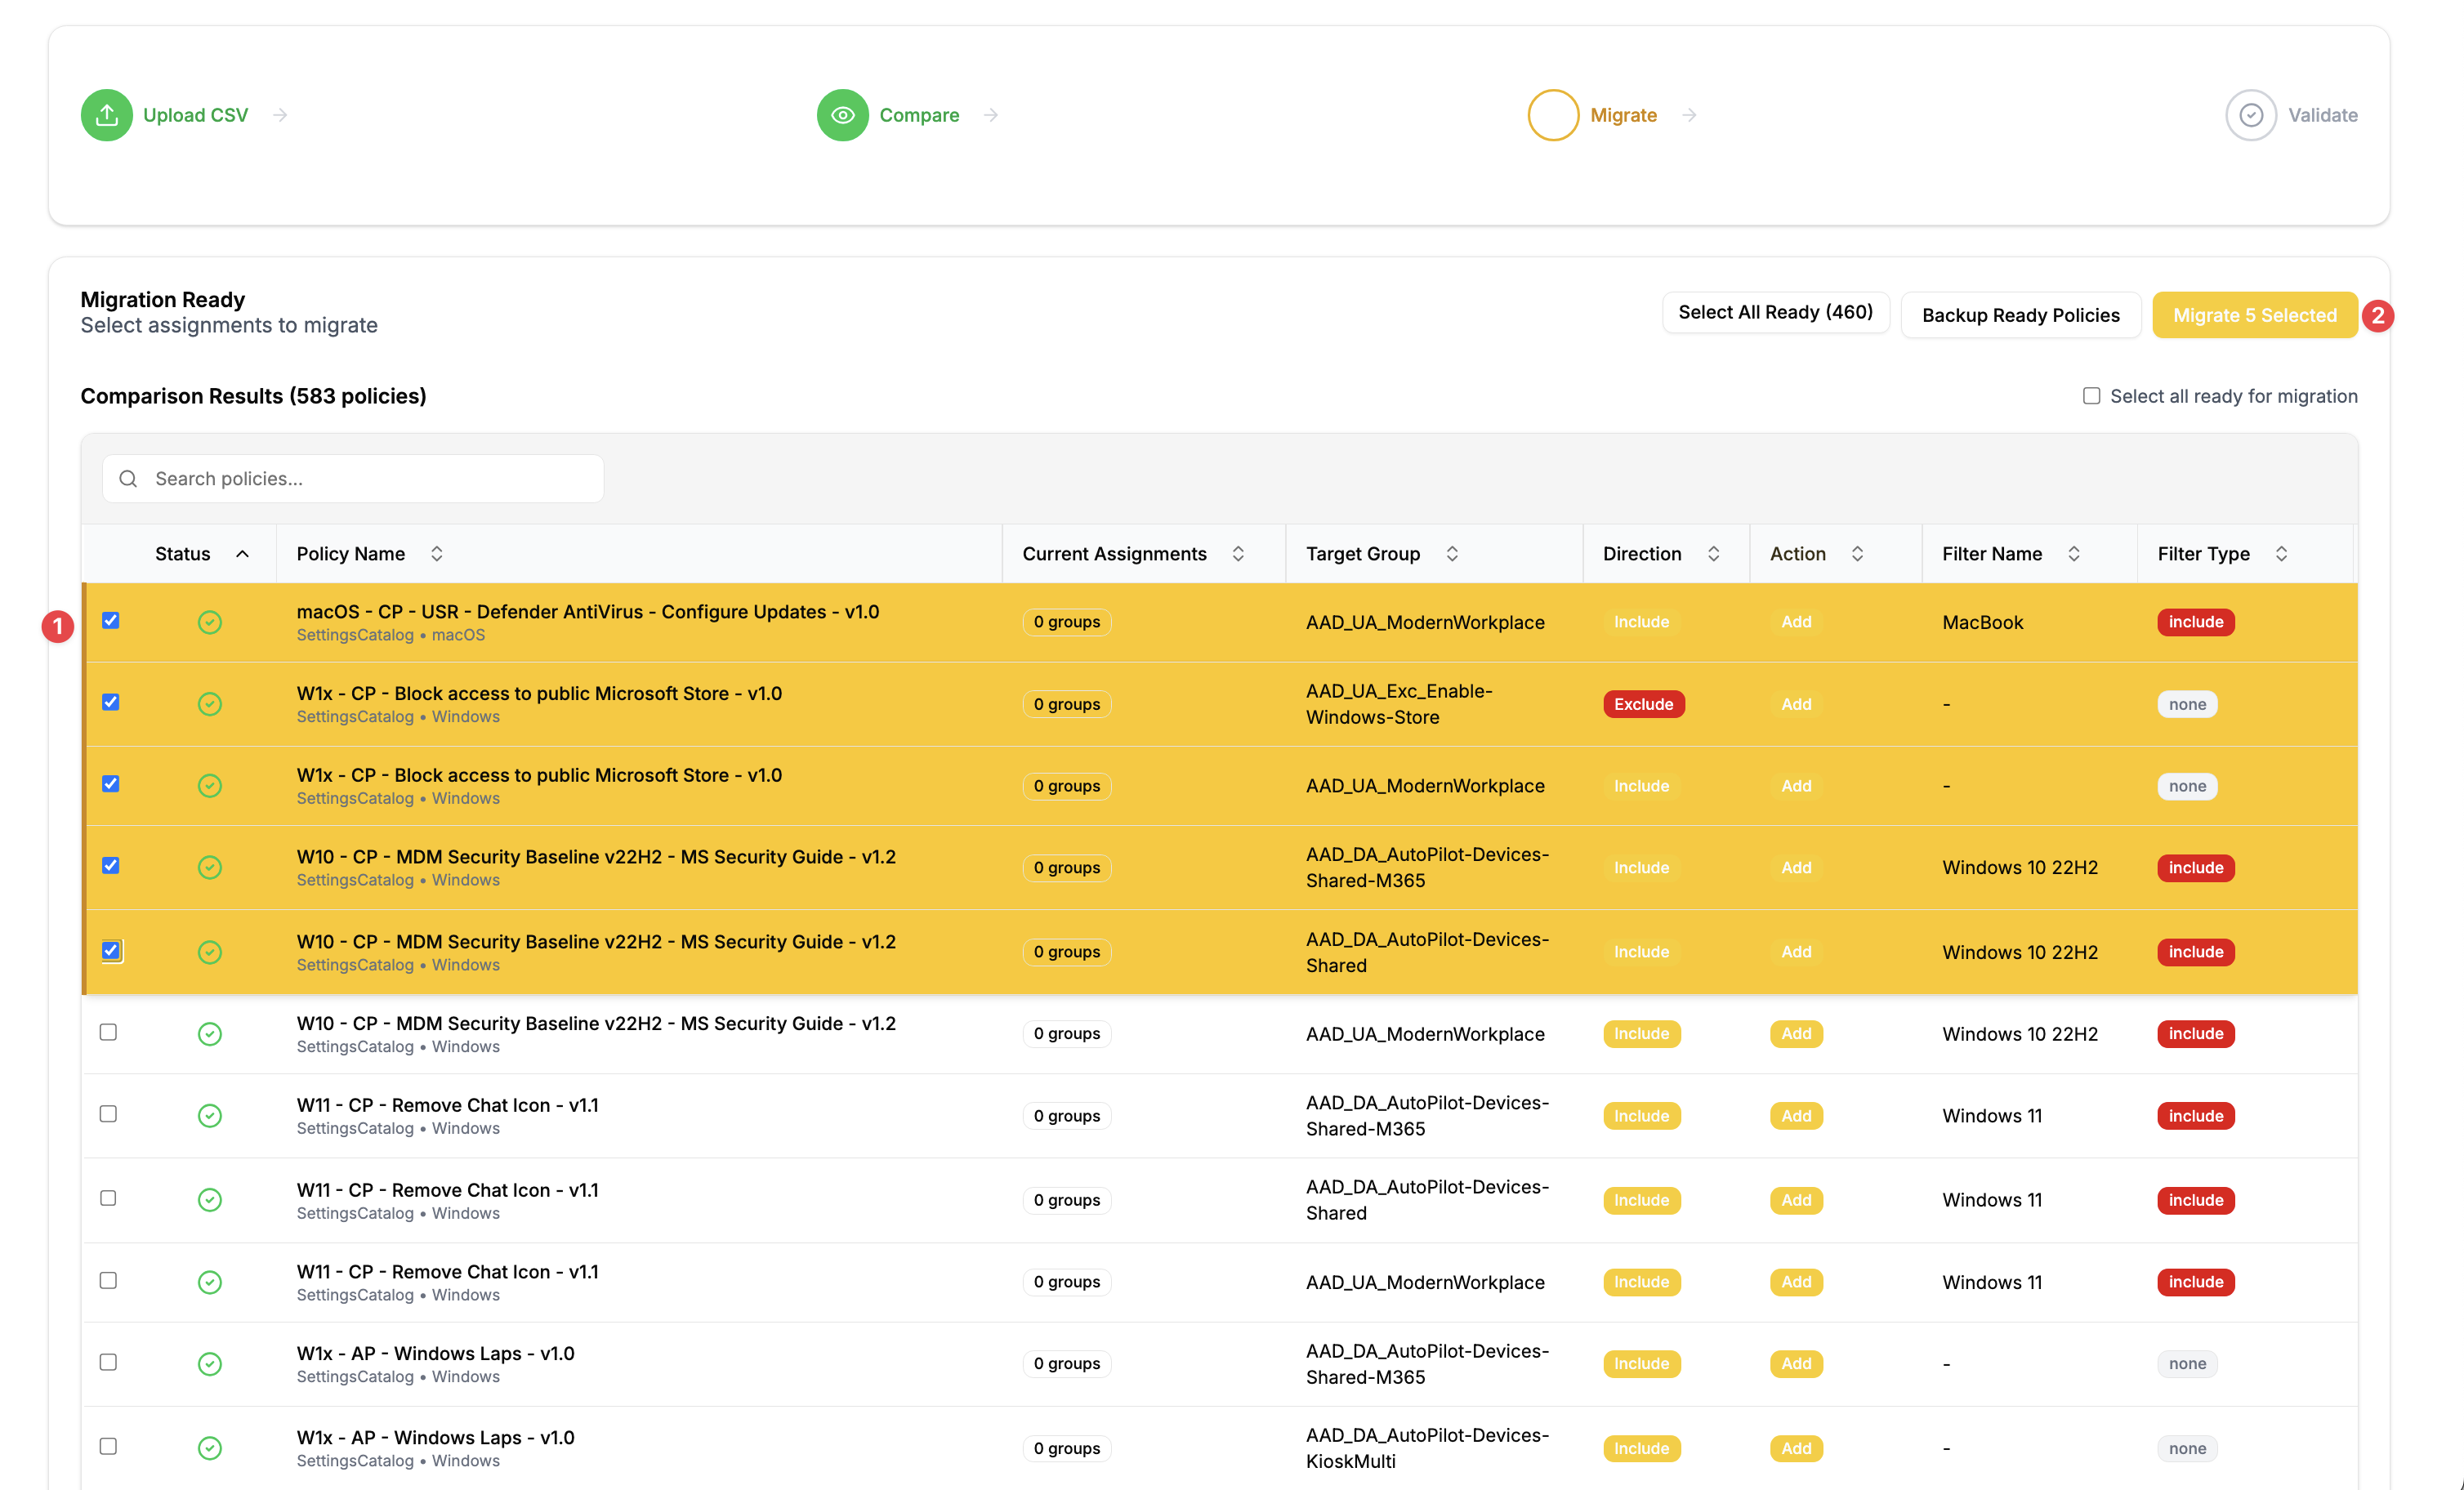
Workflow
Upload → Compare → Select → Validate. A safe workflow for bulk Intune policy assignment changes.
How it works
Assignment Manager is built around a safety-first workflow. You always see what will change before you execute anything—and you always validate after.
Four-step workflow
Upload your desired state in CSV, compare it with the live tenant, choose what to apply, then validate and export results.
1) Upload CSV
Provide a CSV describing the assignment changes.
PolicyName;GroupName;AssignmentDirection;AssignmentAction;Filter;Filter Type
Windows Security Baseline;Finance Department;Include;Add;;
iOS Compliance Policy;All Users;Include;Replace;Corporate Devices;Include
Android App Protection;Sales Team;Include;Remove;;
During upload, the tool validates:
- Required columns & data types
- Obvious conflicts (duplicate rows, invalid actions, etc.)
If the upload check finds issues, you get immediate feedback to fix them. Only the valid rows are processed in the next step. To fix the errors, update your CSV and re-upload.
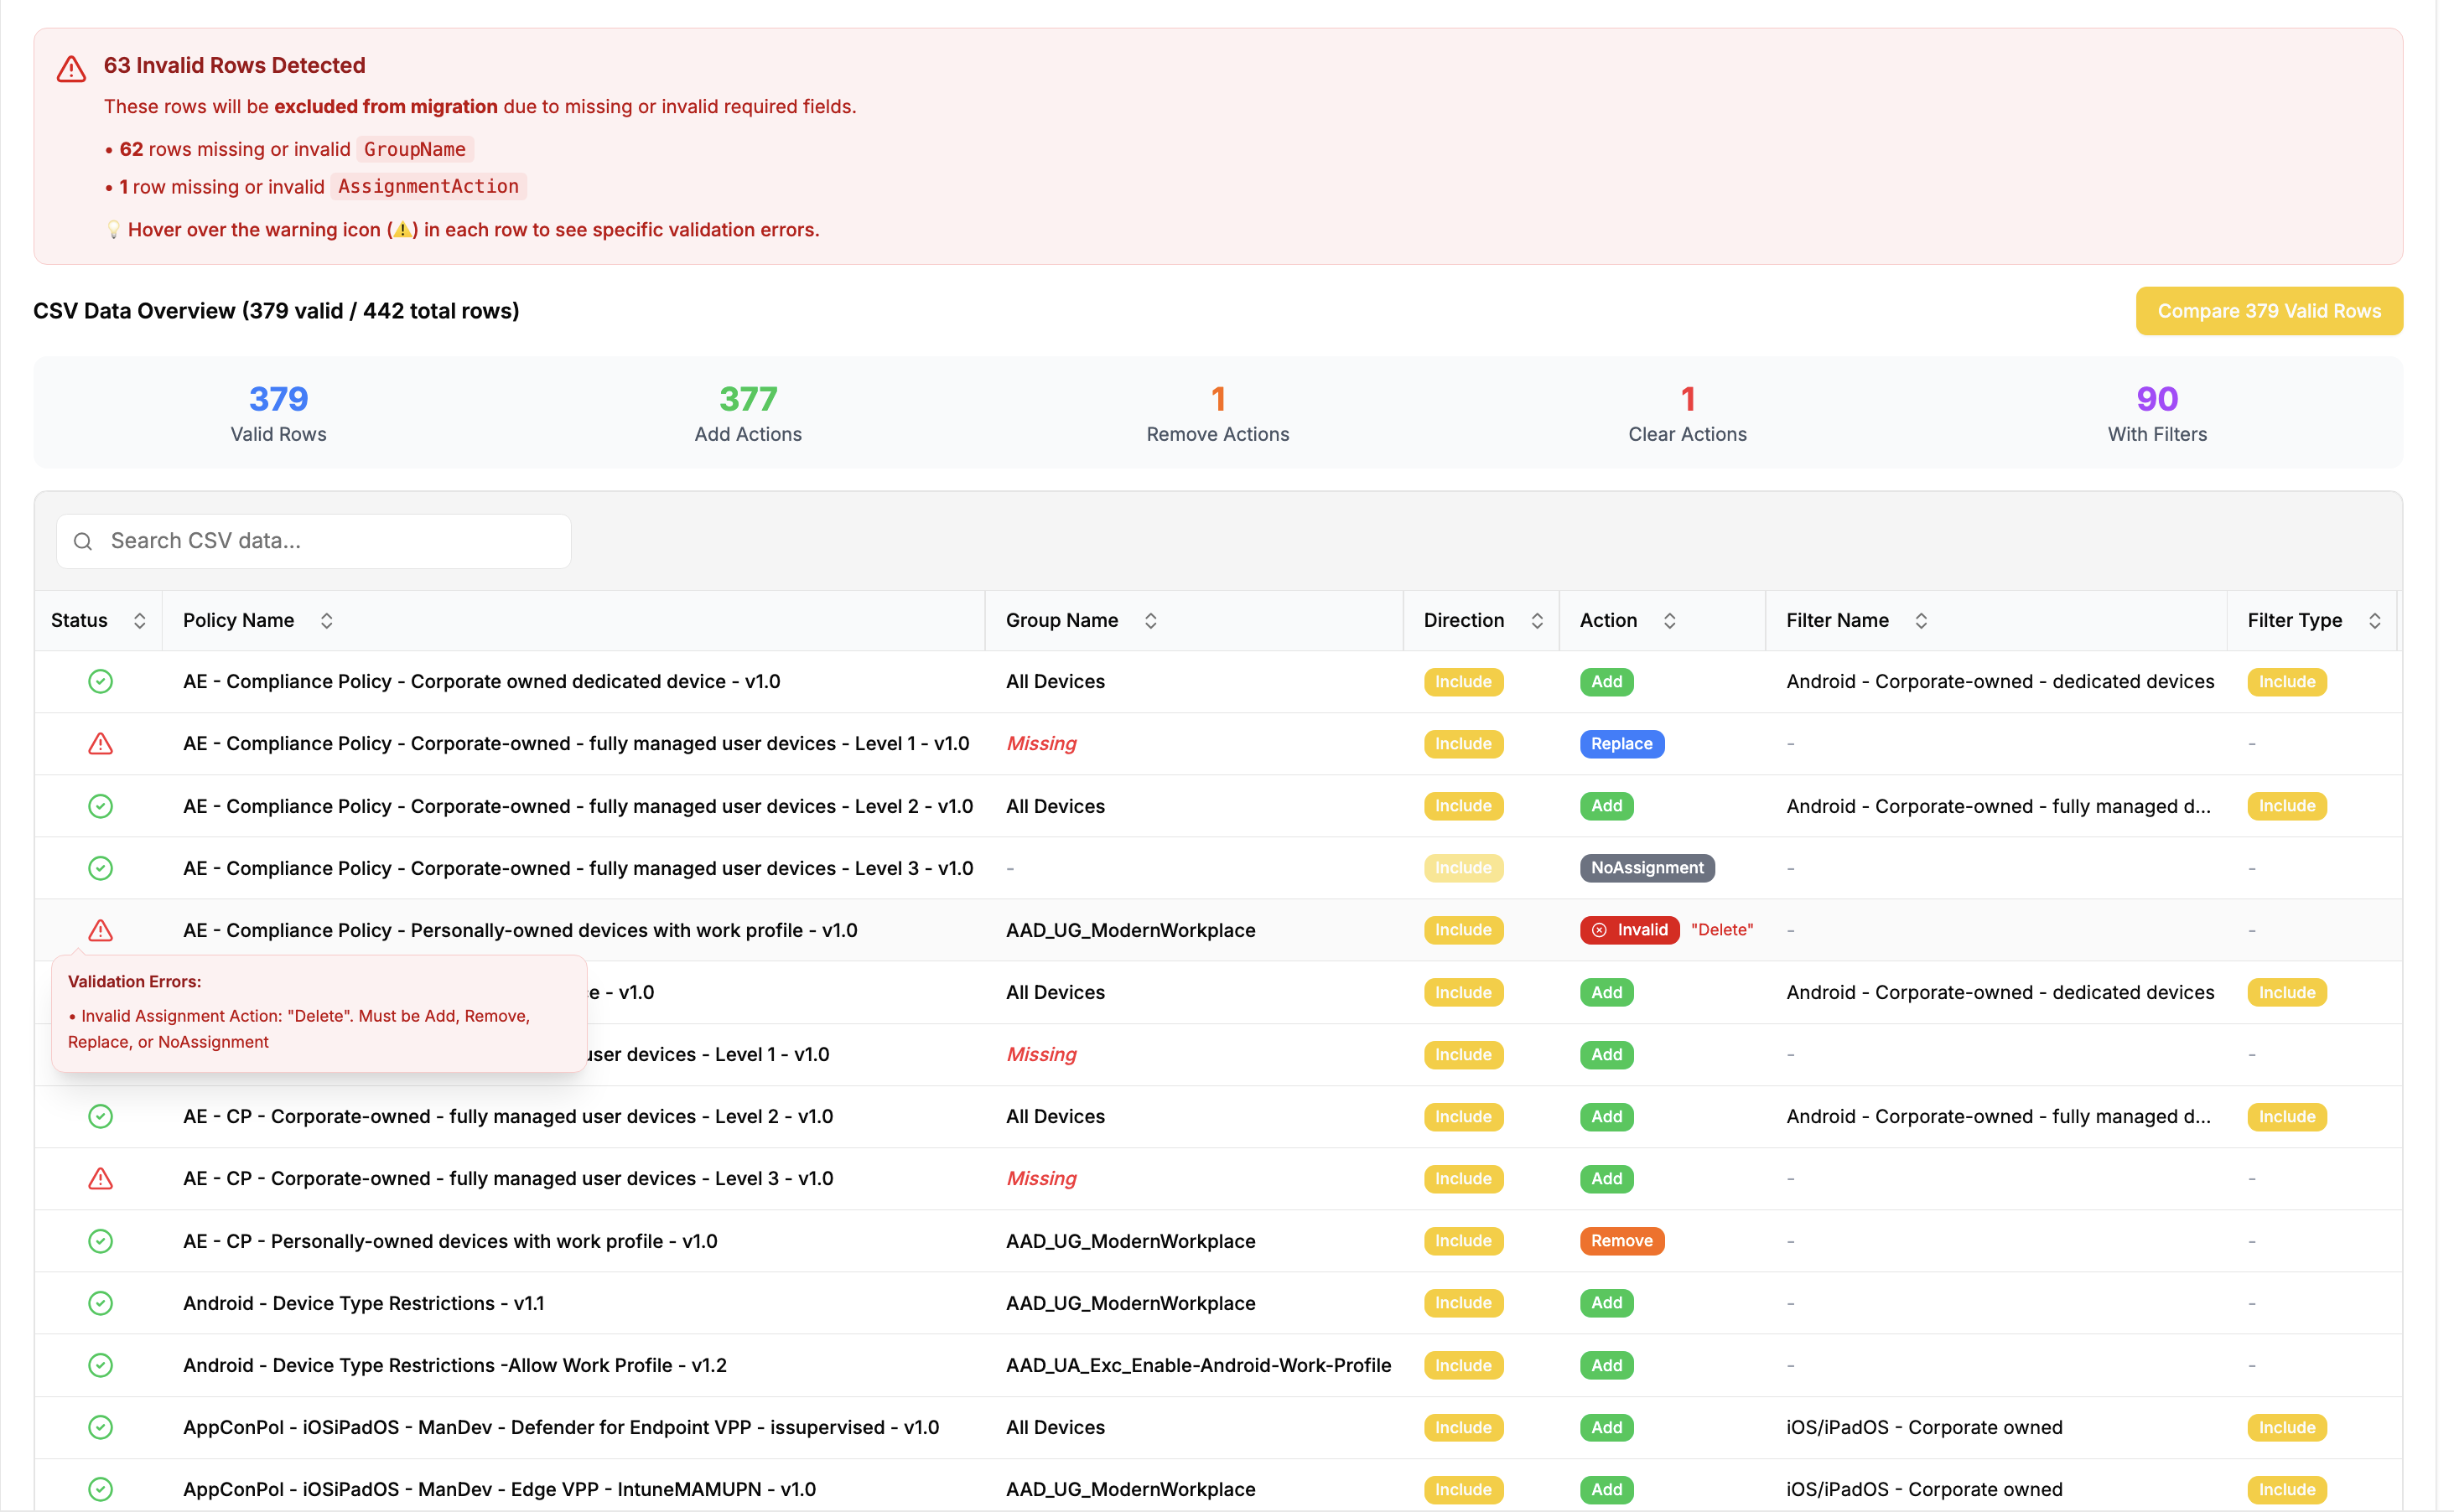
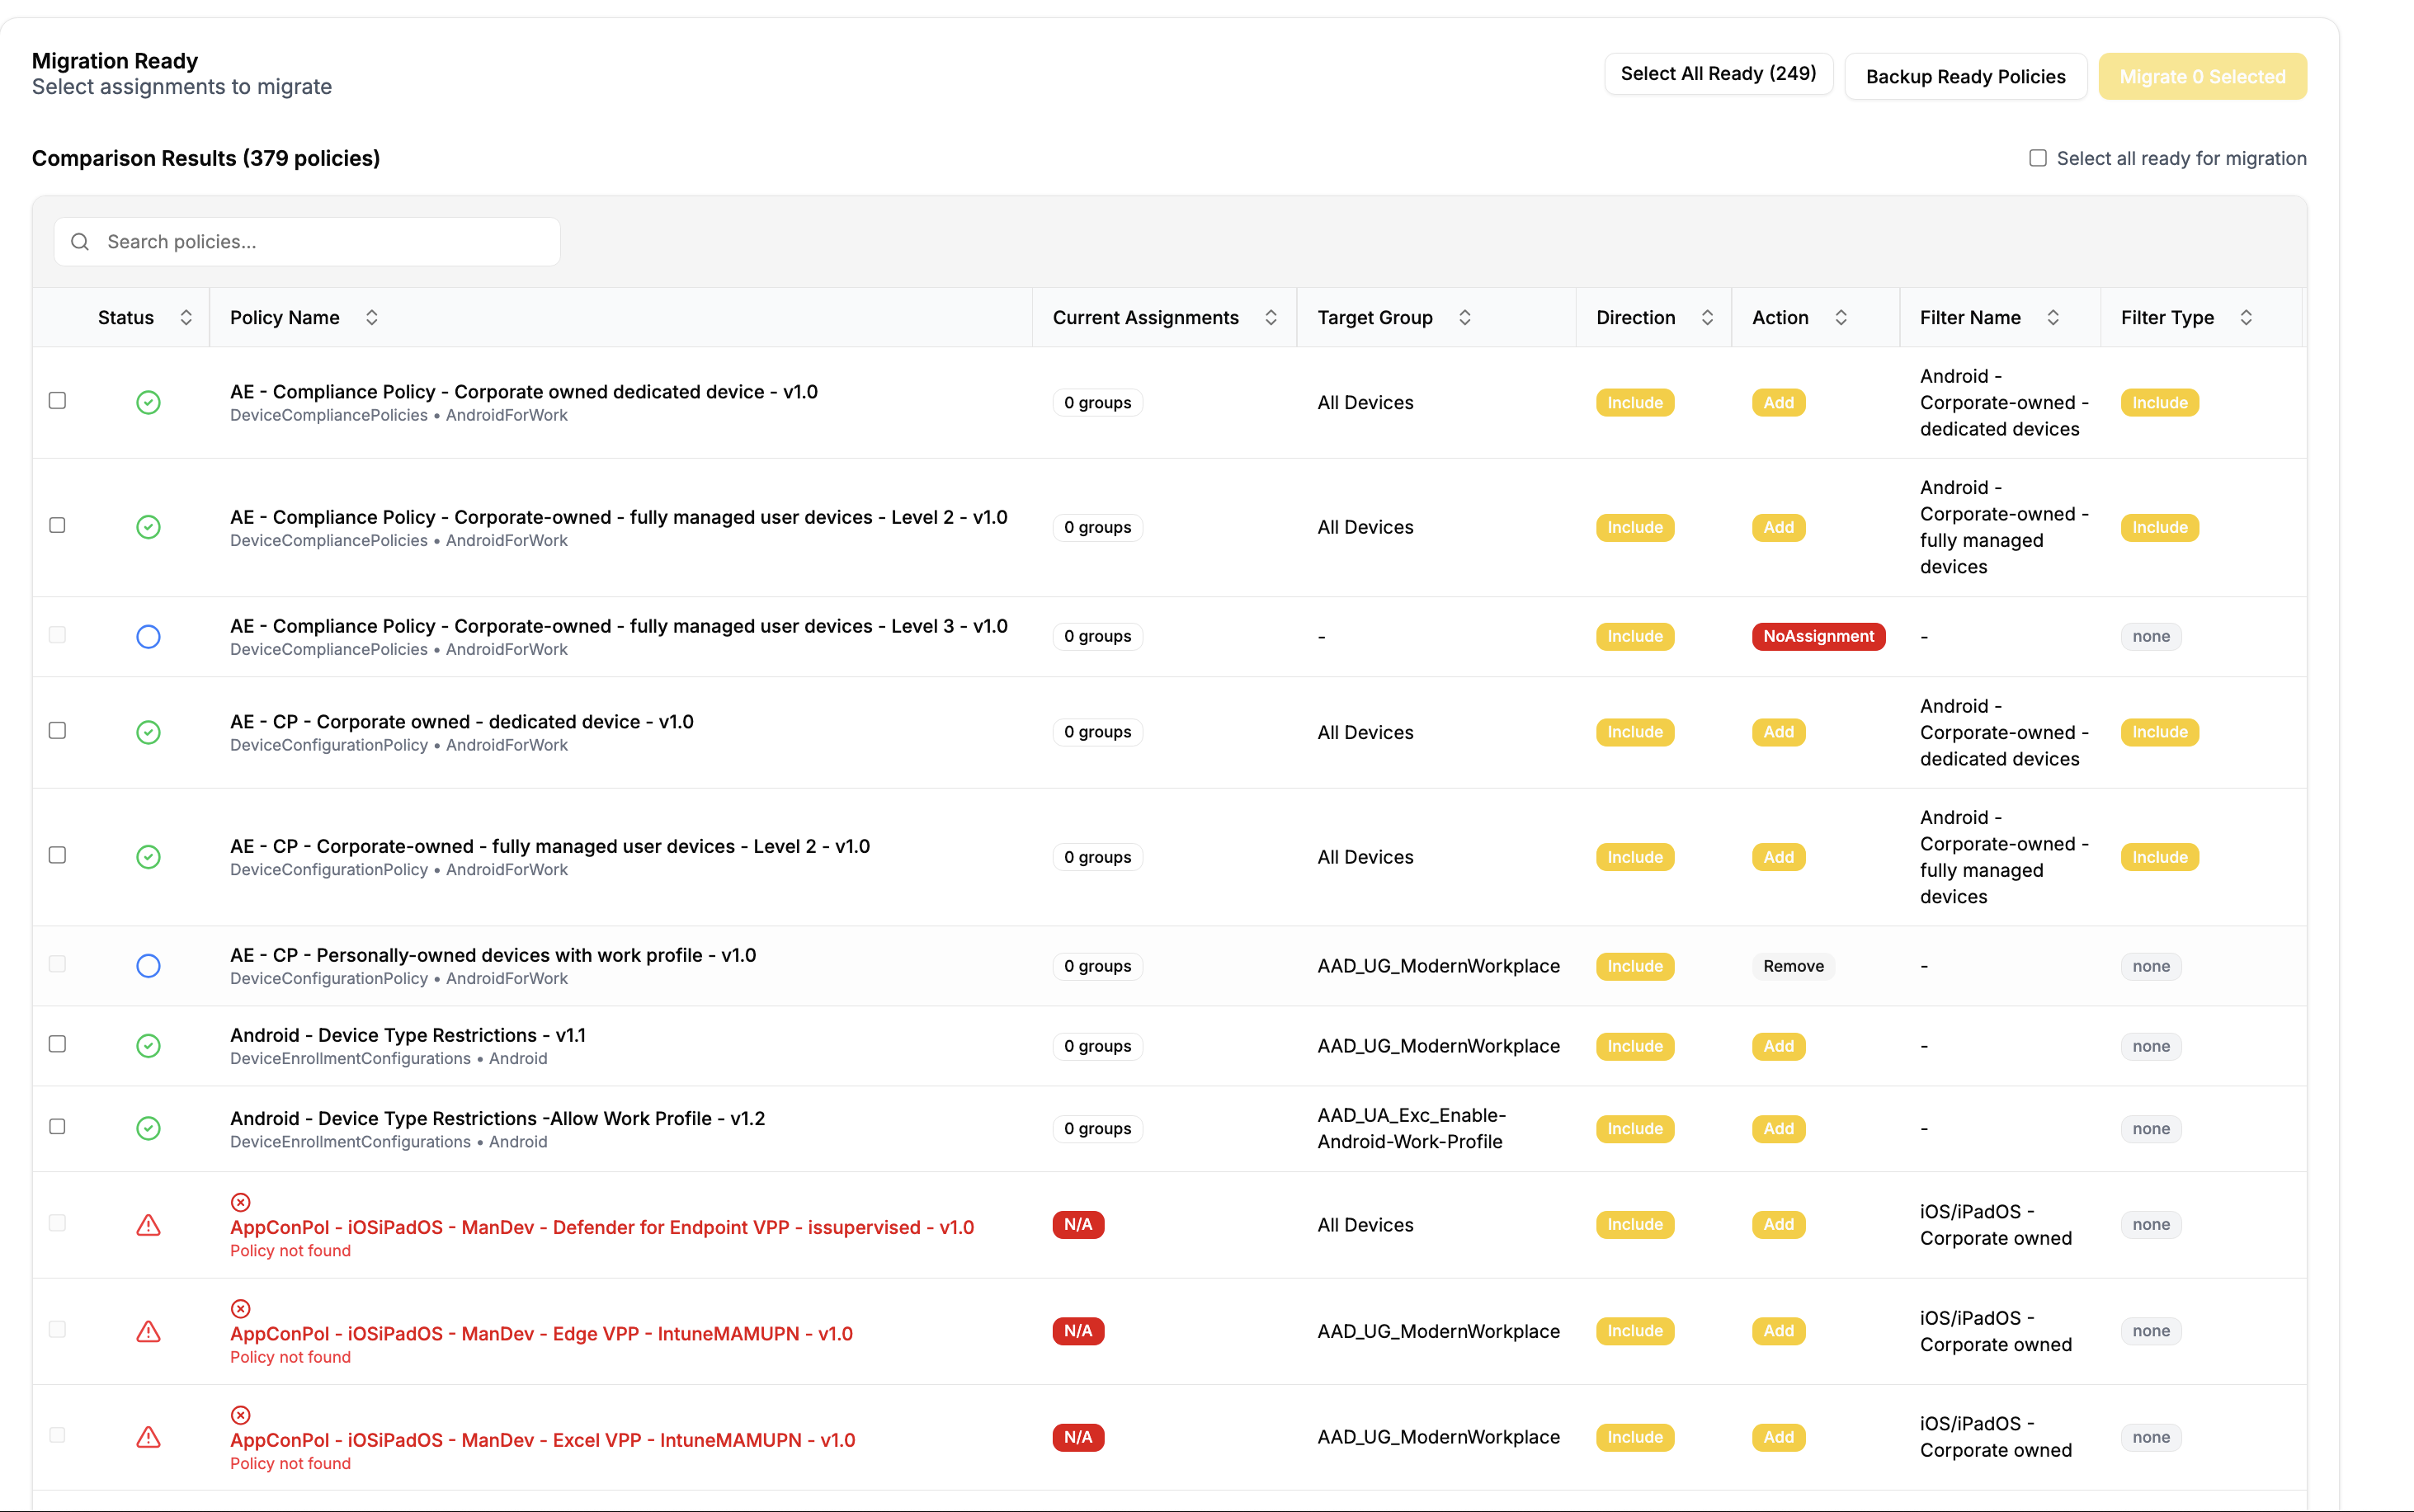
2) Compare (Current vs Planned)
Each row is evaluated against the live tenant state, so you get a precise preview.
Status compare indicators:
-
Ready for migration – Row is ready to implement changes
-
Already migrated – Row is already in the desired state
-
Check errors - Row has issues that need fixing before migration. This can due an non existing policy/group, invalid filter, or duplicate policy names.
Correct the CSV and re-upload to fix. That means, provide a group that actually exists in Azure AD, or a policy that is already created in Intune. If the group or policy doesn't exist, you can also choose to create it first. Then, after creation, upload the CSV again and start over.
3) Select changes (Selective Migration)
You decide exactly what is applied.
- Select/deselect operations
- Batch multiple policies in one run
Recommended for safety
Start with a small pilot CSV, then scale up.
4) Migrate + Validate
Did you reach the desired state?
After migration, Assignment Manager validates the final state:
- Assignments exist as expected
- Filters are applied correctly
- Conflicts are detected and surfaced
- Results are summarized and exportable

Best-practice patterns
Use Replace for clean migrations
When moving from one target strategy to another, Replace avoids leftover assignments.
Keep CSVs in version control
Treat migrations as change-controlled artifacts.
Use filters for exclusions (when possible)
Excluding via filters is usually cleaner than managing parallel exclusion groups.